Category: vmware

  • Getting started with cloud-init and CoreOS

    Lately I’ve been experimenting with CoreOS, a Linux distribution that enforces containerization (I made some experiments with Docker and I’d say that this area is fun!). CoreOS layer of containerization was based Docker, but now that they moved to Rocket. Not only Rocket, though: CoreOS brings some curious innovations to lightweight Linux distributions like clusterization with fleet and service discovery with etcd.

    Since I had to do some tweaks to run CoreOS in a virtual machine (VMware Fusion on OSX is the Type 2 hypervisor I used), I decided to write this post to better illustrate how should you customize CoreOS for the first run.

    First of all, download CoreOS! After importing it in VMware, the tricky part comes in. CoreOS is heavily focused on automation, so you have either two choices to login into your newly created CoreOS machine:

    • boot CoreOS kernel with coreos.autologin parameter active (debug)
    • prepare a cloud-init package that contains your customization. In this case, your ssh pubkey fingerprint. (preferred)

    Let’s see both ways.

    Boot CoreOS with coreos.autologin

    When you see the GRUB menu, edit the current entry and add coreos.autologin

    coreos.autologin

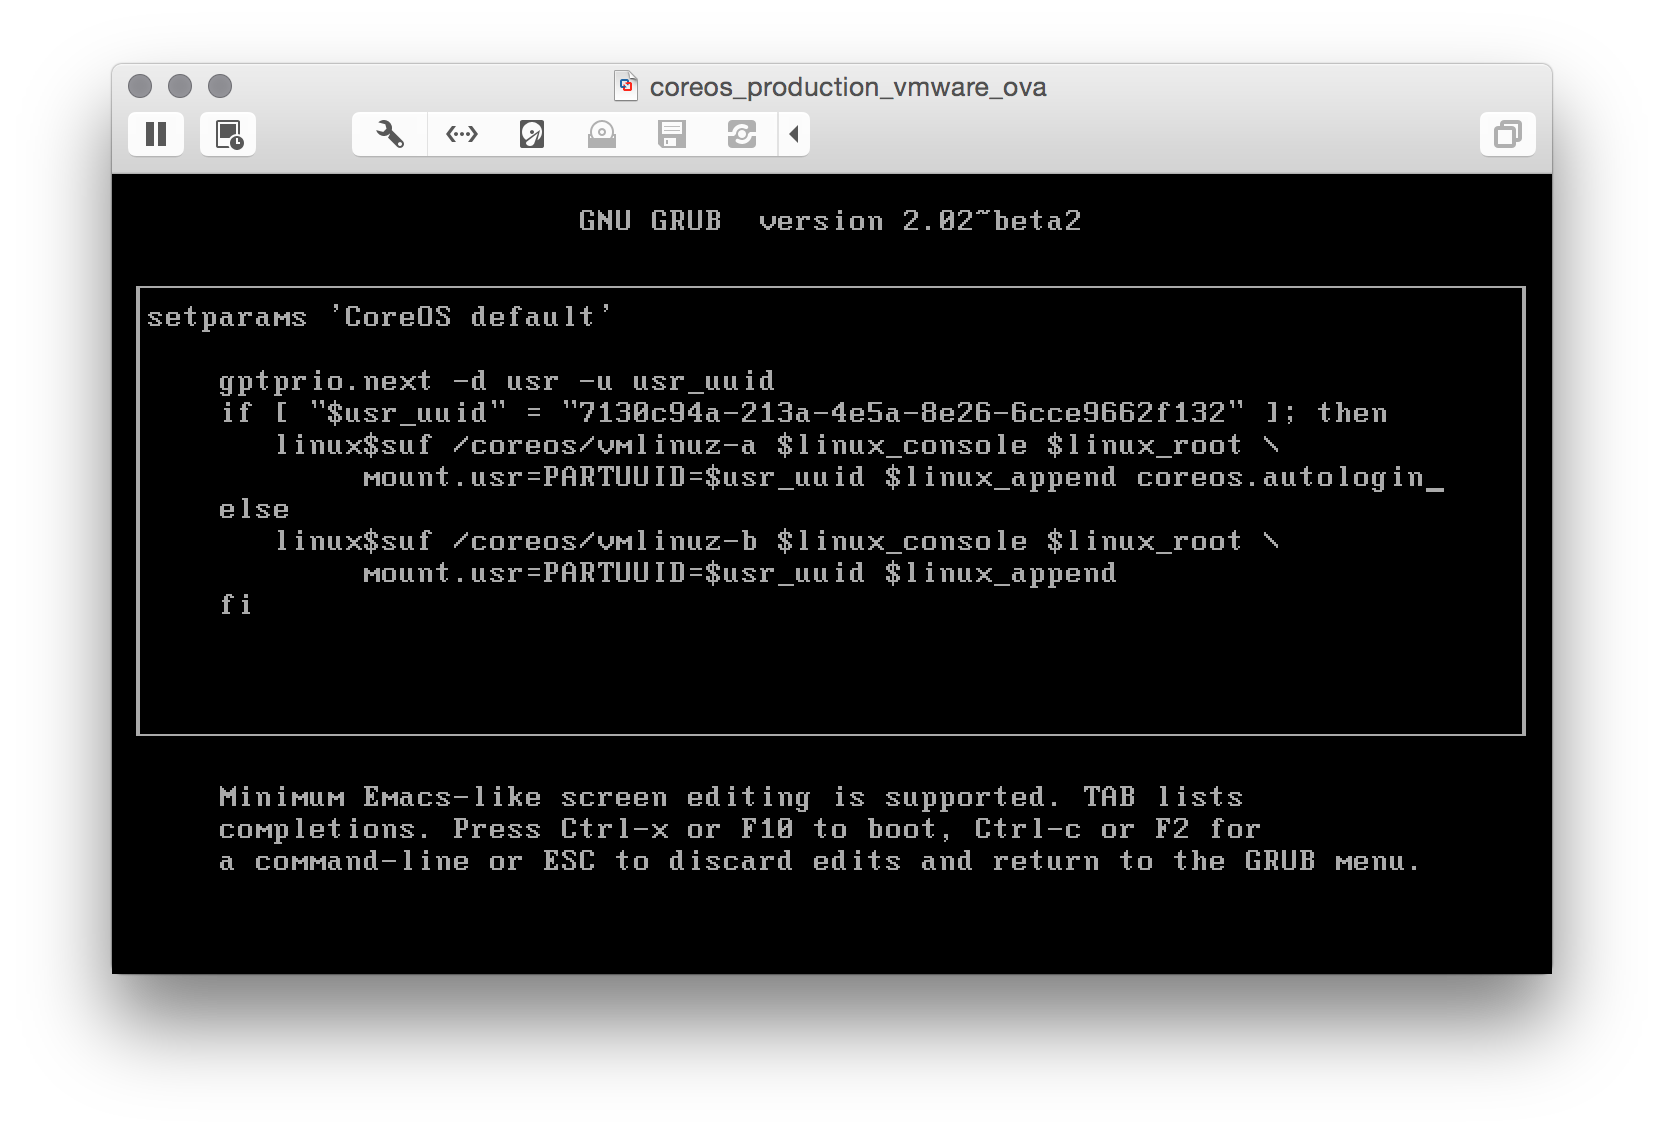
    and you are good to go.

    Note: that with this method only interactive local logins are allowed.

    Prepare a cloud-init package

    This one seems difficult, but it’s not! First of all: cloud-init is a set of scripts that customize a Linux distribution during boot: you can add users, groups, packages and execute commands before the Linux box comes up. CoreOS ships with cloud-init by default, so we only have to:

    1. Write a simple config file (cloud-config)
    2. Package the config into a config-drive (basically, an .iso file)
    3. Mount that iso as a drive for our virtual machine and reboot CoreOS to make your customizations effective

    Write a simple config file

    In our config we will:

    1. Add our ssh pubkey (be sure to have one, or generate it right now)
    2. Set the hostname (who wants a generic hostname anyway?)

    The cloud-config is straightforward: a YAML file where only the first line is equal for everyone:

    # cloud-config 
    ssh_authorized_keys: 
        - "ssh-rsa ... michele@fortknox" 
    hostname: "coreos-test"
    

    Remember to customize it with your pubkey fingerprint and the hostname you want and save it as user_data.

    Package cloud-config into a config-drive

    Now that we have a cloud-config file, we have to package it as a config-drive and make it available as a drive for CoreOS. Since I needed to repeat this process a couple of times, I decided to automate it and I wrote a simple script: configdrive_creator. Be sure to read the instruction: you prepare the config, put it in the same directory of the script, launch the script and the iso is created.

    Mount the iso file as a drive for CoreOS

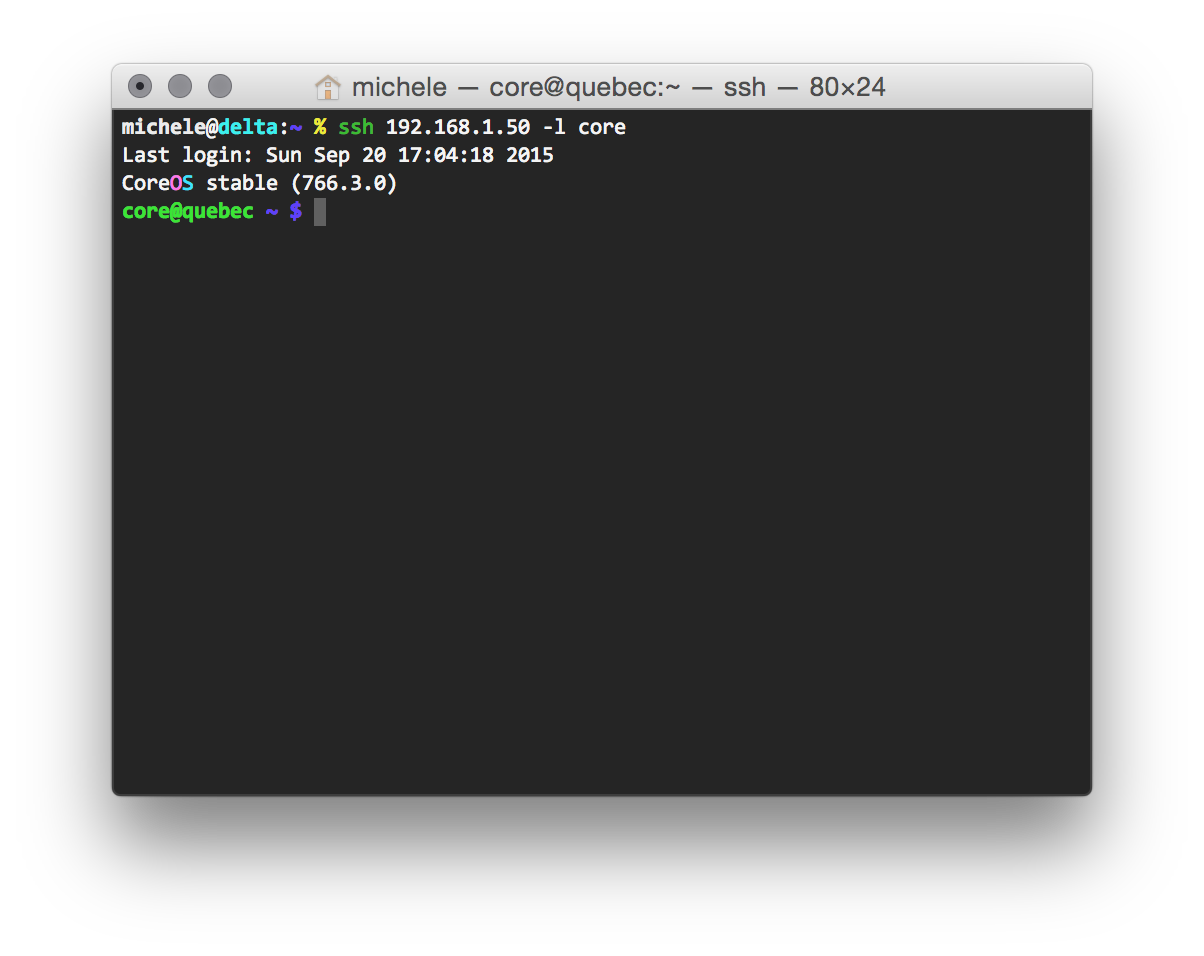
    I am sure you are aware to do it on your own! After rebooting your CoreOS VM, you can finally ssh into it:

    coreos_ssh

    Happy hacking!

  • Convertire una macchina fisica in una virtuale: VMware vCenter Converter

    Ho recentemente convertito due macchine fisiche Windows in macchine virtuali (per questioni di manutenibilità) con un tool gratuito messo a disposizione da VMware: VMware vCenter Converter.

    Una volta installato si occupa di fare un’immagine virtuale di tutto il contenuto dell’hard disk (comprese eventuali partizioni), creando una macchina virtuale (compatibile con VMware e con Oracle VirtualBox).

    Non ho ancora provato a virtualizzare una macchina Linux (mi sono affidato a clonezilla), ma VMware supporta anche la conversione di Linux da fisico a virtuale.

  • VMware Fusion 4: aggiornate la compatibilità delle virtual machines

    Dopo aver aggiornato VMware Fusion alla versione 4, ricordatevi di aggiornare la compatibilità di tutte le vostre virtual machines alla versione 4 (Settings -> Compatibility -> 4). Dovrete reinstallare i VMware tools, ma vista la notevole velocità d’esecuzione che si guadagna, è caldamente consigliato l’aggiornamento.

  • VMWare Fusion e Ubuntu: risoluzione dello schermo fissa a 1280×720. Ecco come risolvere la situazione

    Dopo aver aggiornato la macchina virtuale con Ubuntu 10.10 in VMWare Fusion, mi sono trovato impossibilitato a selezionare una risoluzione superiore a 1280×720.

    Anche dopo aver reinstallato i VMWare Tools, la risoluzione disponibile era sempre bloccata a 1280×720. Dopo aver fatto qualche ricerca nei log, ho trovato alcuni messaggi che evidenziavano il problema:
    could not apply the stored configuration for monitors
    Xserver does not support size requested
    VESA(0): Unable to estimate virtual size
    VESA(0): Not using built-in mode "2048x1536" (no mode of this name)
    VESA(0): Not using built-in mode "1920x1440" (no mode of this name)
    VESA(0): No valid modes left. Trying less strict filter...
    VESA(0): : Using hsync range of 31.50-37.90 kHz
    VESA(0): : Using vrefresh range of 50.00-70.00 Hz
    VESA(0): Unable to estimate virtual size
    VESA(0): Not using built-in mode "2048x1536" (hsync out of range)
    VESA(0): Not using built-in mode "1920x1440" (hsync out of range)
    VESA(0): Virtual size is 1280x720 (pitch 1280)

    Il problema risiede nella configurazione e nel rilevamento della risoluzione dello schermo; il pacchetto incriminato è quindi xserver-xorg-video-vmware. Per risolvere è sufficiente aprire un terminale e digitare:

    1. sudo apt-get remove xserver-xorg-video-vmware
    2. sudo apt-get install xserver-xorg-video-vmware
    3. fate un logout e un login, e la risolzione ottimale verrà ripristinata
  • VMware: come risolvere il problema “this machine appears to be in use”

    Se VMware non vi permette di avviare una macchina virtuale che è stata spenta brutalmente (= senza un opportuno shutdown o suspend)  lamentandosi che “this machine appears to be in use” procedete in questo modo:image

    1. Chiudete VMware
    2. Localizzate la directory dove avete i file fisici della virtual machine che non si avvia (di default stanno nella cartella Documents/ del disco locale o nella vostra home – ad esempio, nel mio caso in /home/michele/vmware/Ubuntu)
    3. Andate nella directory del punto 2 e, creando una copia di backup, spostate i files con estensione *.lck in una directory temporanea [C:\Windows\Temp (Windows) o /tmp (Mac/Linux)]
    4. Riavviate la macchina virtuale: questa volta si avvierà senza problemi.

    Nota: cosa sono i file *.lck? Sono file di locking che VMware crea ogni volta che la virtual machine è in uso: se accidentalmente questa viene “spenta” in modo errato, questi files non vengono rimossi da VMware; ecco perché bisogna farlo manualmente.